

AI Expand Video: How Frame Outpainting Works for Vertical Clips
AI expand video usually means generating new image area beyond a clip’s original frame so it fits a different shape, such as turning a horizontal shot into a vertical one. It is different from extending a clip’s duration: one adds pixels around the picture, the other adds time to the shot. For creators repurposing podcasts, streams, and YouTube footage, the right choice depends on whether the problem is empty space around the subject or not enough usable footage.
What “expand video” means, and what it does not
Video expansion can refer to two separate operations. Frame expansion, often called outpainting, creates image content outside the original borders. Duration extension generates or repeats visual content to make a shot longer. Some tools use similar language for both, so check whether the output changes the frame dimensions, the clip length, or both.
Frame expansion: add a wider or taller canvas
Suppose an interview is recorded at 1920 × 1080 pixels, a 16:9 landscape shape. A 1080 × 1920 vertical canvas has a different composition: simply placing the whole landscape frame inside it leaves empty bands, while filling the canvas by cropping can cut off the speaker. Outpainting makes additional image area around the original frame so the subject and more of the scene can fit the new layout. Adobe describes Generative Expand in Photoshop as a way to enlarge an image area and generate content in the added space; applying the same idea to video means handling that expansion across a sequence of frames, not just one still image. Adobe’s Generative Expand documentation explains the image-level operation.
Duration extension: add more frames in time
Duration extension attempts to continue a shot after its original endpoint. Adobe’s Premiere Pro Generative Extend documentation describes extending a clip by generating additional visual frames. That may help cover a transition or provide a little more room for an edit, but it does not make a landscape frame vertical. If a podcast clip ends too abruptly, duration extension may be relevant; if the guest is cut off after converting to portrait, frame expansion or reframing is the issue.
These examples show why the distinction matters. The measurements are illustrative dimensions, not a recommendation for every platform or export:
- Landscape interview to portrait: expand a 1920 × 1080 frame toward a 1080 × 1920 composition when cropping would remove the guest or a second speaker.
- Streamer facecam and gameplay: reframe a 16:9 VOD into a 9:16 layout by prioritizing the streamer’s reaction; expand only if the chosen layout needs more background around the facecam.
- Product demo for a vertical feed: keep the hands and product visible, then expand the plain tabletop or wall if the source shot has too little room above or below.
- Short pause before a punchline: consider duration extension only when more time is needed; generating extra background around the frame will not create a natural pause.
Why expansion matters when repurposing long footage
Vertical conversion is not a simple export setting. A crop changes what viewers can see, while expansion changes the scene itself by adding generated pixels. For a one-person podcast, a centered close-up may crop cleanly. For a two-person interview, a shared wide shot may not contain enough room for both speakers in a portrait crop. The practical question is whether the important content fits inside the source frame, not whether an AI tool can produce a taller file.
That distinction affects editorial trust. Cropping can remove a co-host’s reaction, on-screen slides, or a streamer’s gameplay HUD. Outpainting may preserve the original people and objects while inventing nearby scenery, but that scenery is not evidence of what was outside the camera’s view. In a legal, medical, or news context, added pixels can create a misleading impression if viewers take them as recorded reality.
Expansion is most useful when:
- The subject is already framed safely, but the destination shape needs extra background.
- The added area is visually low-risk, such as a plain wall, studio backdrop, sky, or soft-focus room.
- The clip’s meaning survives the change, and no important text, person, or event needs to be fabricated.
- There is time for review across the full shot, not just inspection of one attractive frame.
It is a poor substitute for editing choices. If a speaker is too small in the original shot, adding canvas will not make them larger. If the clip contains a chart whose labels matter, cropping or generating around the chart may both reduce clarity. In those cases, use a deliberate split layout, a cut to a closer angle, or a separate vertical recording when available.
How an AI video expansion workflow works
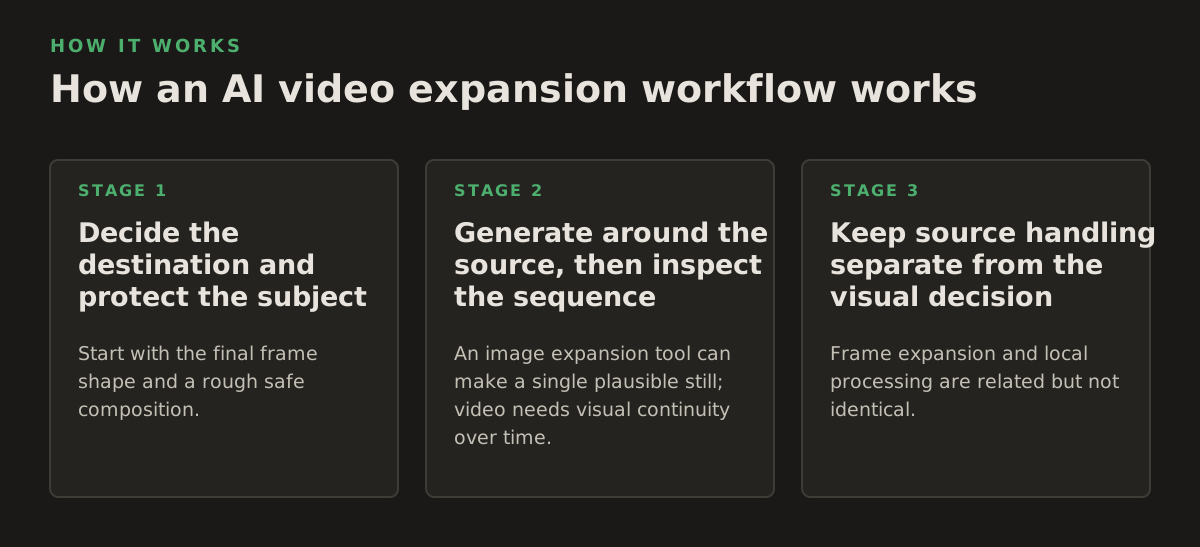
1. Decide the destination and protect the subject
Start with the final frame shape and a rough safe composition. A typical illustrative conversion is 16:9 landscape to 9:16 portrait, but platform requirements and channel templates can change. YouTube’s current guidance on Shorts eligibility and uploads is a useful reminder to verify current format and duration rules at publishing time rather than relying on an old export preset. Before generating anything, identify faces, captions, gestures, shared screens, and other elements that must remain visible.
Then choose the least invasive method:
- Crop and reframe when the key subject fits in the source image and tracking can keep it in view.
- Use a designed layout when a wide screen, second speaker, or gameplay view must remain readable.
- Outpaint the frame when added surroundings can plausibly fill unused space without changing the event.
- Extend duration when the shot needs more time, not more canvas.
2. Generate around the source, then inspect the sequence
An image expansion tool can make a single plausible still; video needs visual continuity over time. A background that looks convincing in one frame can shimmer, warp, or change shape from frame to frame. Treat the output as a sequence with two tests: does each frame look acceptable, and does the added area remain stable as the camera or subject moves? For technical editing, FFmpeg’s filter documentation distinguishes operations such as scaling, padding, and cropping; those deterministic operations can change framing but do not synthesize missing scene content. See the FFmpeg filters reference when building a reproducible crop or padding step.
For a generated expansion, review at normal playback speed and frame-by-frame around movement, occlusions, and cuts. Check the edges where original and generated pixels meet. Watch for a duplicated microphone, a chair leg that bends, a background object that vanishes, or a shadow that changes direction. If the tool exposes a prompt or selection region, keep the instruction narrowly about the surrounding environment; do not ask it to invent details that affect the clip’s meaning.
3. Keep source handling separate from the visual decision
Frame expansion and local processing are related but not identical. A tool may generate expanded imagery on a remote service, while another part of the workflow analyzes and edits footage on a desktop. For sensitive interviews, client recordings, or medical and legal material, check where the source file and generated frames are processed before using any online generative feature. “AI” does not tell you where a file goes; review the specific product’s current data-handling terms and your organization’s rules.
A local workflow can help keep the source footage on the workstation during analysis and clip preparation. ClipForge is a Windows desktop tool that analyzes long-form footage locally and supports vertical reframing, captions, and batch processing. Its local AI video editing approach is relevant when the job is finding and preparing clips without uploading video files to the cloud; it should not be confused with generative outpainting, which is a separate image-making operation.
Where AI expansion breaks down
Expansion is least dependable where the model must infer important structure. A plain wall has fewer constraints than a moving hand holding a surgical instrument, a product label, or a legal exhibit. Even when the outer background is unimportant, a moving camera can expose inconsistencies that were hidden in a still preview. Inspect the whole shot, not just its first frame, and reject the result if an invented detail could change a viewer’s interpretation.
Look specifically for these failure modes:
- Temporal drift: a generated wall pattern, window, or shelf shifts as the person moves.
- Boundary artifacts: hair, glasses, a microphone, or a shoulder develops a halo where generated and original areas meet.
- False scene details: the system adds a sign, screen content, object, or person that appears to have been present during recording.
- Bad geometry: straight lines bend, repeated objects multiply, or a room corner changes shape between frames.
- Misleading context: the extra area makes the scene appear larger, more populated, or differently arranged than the recording supports.
Captions introduce another constraint. If captions are burned into the source, expanding or cropping may leave them too low, too small, or partly outside the new safe area. If captions are added after reframing, they can be positioned for the final output. Either way, inspect the preview on a phone-sized display and confirm that the text does not obscure the speaker’s mouth, a product, or platform controls.
For regulated or evidence-sensitive work, use a conservative rule: do not use generated pixels to complete facts. Keep the original, label generated areas where policy requires it, and get approval from the responsible editor or client. If the footage must remain an unaltered record, use a crop, padding, or a clearly designed background instead of synthesizing scene content.
How practitioners should apply it to recurring clip work
For a podcaster, first locate the moment and decide whether a tight single-speaker crop carries the exchange. If the second guest’s reaction matters, a split layout is often more honest and readable than inventing a wider studio. For a streamer, keep gameplay information and facecam hierarchy intentional: a vertical crop that hides the game objective may be worse than a layout with the game above and reaction below. For a social media manager processing a batch, set a consistent crop and caption template first, then reserve expansion for clips where the surrounding scene is safe to generate.
A practical review checklist for each candidate clip:
- Mark the must-keep content: faces, hands, screen text, products, gestures, and any second speaker.
- Try reframing before generation: if the subject remains visible, avoid adding pixels just because the tool offers it.
- Use expansion selectively: choose shots with stable, low-detail surroundings and no factual dependence on the added area.
- Review motion and edges: play the whole result, pause on difficult frames, and compare important details with the source.
- Export and check the actual destination: verify captions, crop, and legibility in the platform preview before scheduling or publishing.
For high-volume teams, track the decision at clip level: “reframed,” “designed layout,” or “expanded and reviewed.” This small record helps an editor explain why a clip looks different from the source and makes it easier to revisit a questionable shot. Batch processing can handle repeatable analysis and preparation, but batching should not eliminate visual review for generated areas.
Choose expansion only when the new space solves a specific framing problem and the resulting scene remains honest. For teams that need to find moments, reframe footage, add captions, and prepare batches locally, ClipForge offers a Windows workflow for turning long-form video into vertical clips without sending video files to the cloud.
Authored with NotFair SEO