

How to Choose an AI Video Clipping Tool for Local, High-Volume Workflows
An AI video clipping tool finds candidate moments in long footage and helps turn them into short, publishable videos. For podcasters, streamers, and teams handling sensitive recordings, the right choice depends on more than how many clips it suggests: check where the video is processed, whether captions and reframing are editable, and how well the workflow fits your Windows machine and review process.
What an AI Video Clipping Tool does, and what it does not
A clipper typically analyzes a long recording for signals that may indicate a self-contained moment: speech, changes in topic, emphasis, pauses, or visual activity. It then proposes start and end points, often with a vertical crop and captions. The goal is to reduce the time spent searching and assembling, not to establish that a moment is accurate, legally usable, or compelling to every audience.
Candidate selection is a ranking task. A system estimates which spans may work as clips; it does not understand your full publishing strategy unless you provide relevant context and review the results. A guest’s brief aside may sound dramatic when removed from the interview, while a quieter explanation may be the segment your audience actually needs.
Editing still has several separate jobs: choose a useful moment, preserve its meaning, make the picture work in a vertical frame, and prepare text that is legible and accurate. Some tools automate parts of each job; others focus mainly on finding timestamps. Before comparing products, list which stages are slowing your team down.
- A podcast producer may need searchable speech and several candidate excerpts from each episode.
- A streamer may need to locate a reaction or explanation in a long VOD, then check that the crop follows the right player or speaker.
- A social media manager may need consistent caption styling and repeatable exports across a batch.
- A legal or medical team may prioritize keeping source recordings inside an approved environment over reducing edit time.
Why the workflow matters to creators and teams
Short-form publishing is often a pipeline problem rather than a single editing problem. If every episode requires manual scrubbing, caption entry, reframing, and export, the work grows with the volume of footage. Automation can make the first pass easier to scale, but the value depends on whether its output fits the destination and can be checked without rebuilding every clip.
Measure effort saved at the task level. A useful pilot records how long it takes to find a publishable moment, correct its boundaries, fix the transcript, adjust the crop, and export. Compare that total with your current process on similar footage. Count rejected suggestions too: a high volume of unusable candidates can shift work from searching to cleanup rather than remove it.
For a YouTube creator, a transcript can help locate a useful explanation, but the clip still needs a coherent beginning and end. YouTube’s guidance explains how Shorts are created and uploaded, including the vertical or square format; check the current requirements for the publishing account and workflow before settling on export settings (YouTube Help: Create YouTube Shorts).
Repurposing is not simply resizing. A wide interview may place two speakers at opposite edges of the frame. A vertical version that crops to one face can make the exchange confusing, even if the speaker’s words remain intact. For a stream, a crop that hides the game interface or chat context may remove the reason the moment mattered. Test the actual source formats and destinations you use.
- Illustrative podcast example: From a 50-minute interview, review a proposed 42-second answer and check that its opening question or a short setup remains understandable.
- Illustrative stream example: From a 3-hour VOD, inspect a proposed 28-second reaction and verify that the vertical crop includes the player and the relevant on-screen event.
- Illustrative business example: From a 20-minute training session, turn a 65-second procedure explanation into a draft clip, then have the responsible subject-matter reviewer verify its wording and context.
These durations are examples, not performance benchmarks or platform limits. The important test is whether a suggested segment works as a complete unit for its intended viewers.
How clipping, captions, and reframing fit together
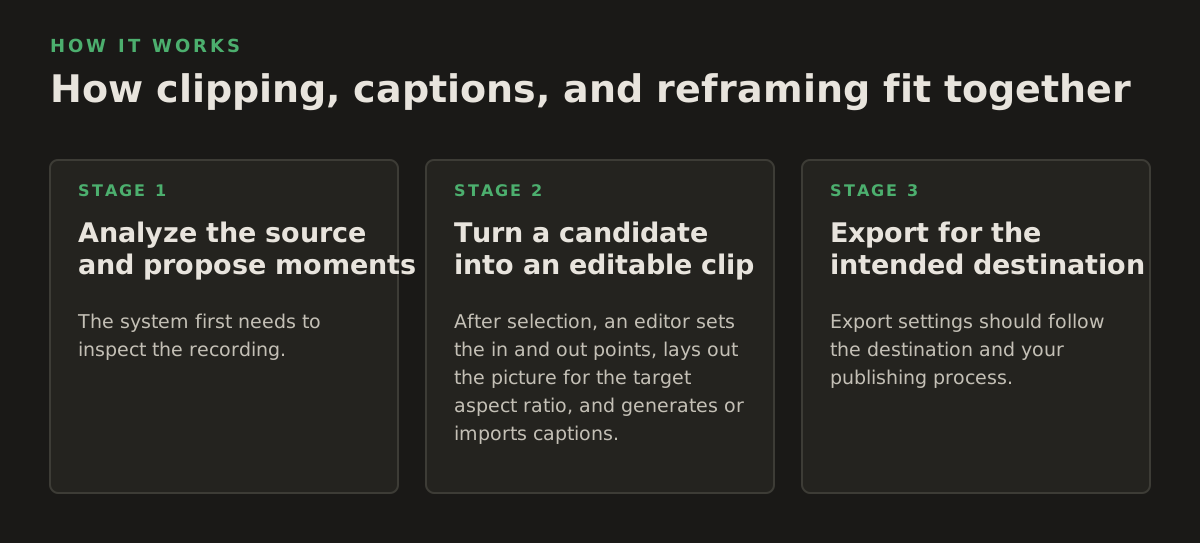
1. Analyze the source and propose moments
The system first needs to inspect the recording. Depending on the tool, it may use speech recognition, audio cues, visual analysis, or a combination. Speech recognition can make spoken content searchable, but it is not the same as identifying a strong story beat. OpenAI’s Whisper project describes a speech-recognition model trained on multilingual audio; that illustrates one possible component, not a guarantee that every clipper uses it or produces publication-ready transcripts (Whisper project documentation).
Ask what signals drive suggestions. If your show relies on dialogue, test speech-heavy interviews. If your VODs depend on gameplay or visual reactions, include footage where the important event happens on screen. A system that performs well on clean, single-speaker audio may not be as useful on overlapping conversation, music, or noisy live commentary.
2. Turn a candidate into an editable clip
After selection, an editor sets the in and out points, lays out the picture for the target aspect ratio, and generates or imports captions. These operations interact: tightening a clip can cut off a sentence; changing the crop can move a face under the caption area; correcting a transcript can change line breaks and timing.
Editable output is more useful than a polished-looking preview. Check whether you can adjust boundaries, correct words, move the crop, and export again without starting over. YouTube notes that automatic captions can misrepresent speech, for example when audio quality or speaker conditions are difficult, so treat generated text as a draft rather than a verified transcript (YouTube Help: Use automatic captions).
3. Export for the intended destination
Export settings should follow the destination and your publishing process. A vertical file is not automatically ready for every platform: check its dimensions, audio, caption placement, and any account-specific upload rules. The FFmpeg filter documentation describes operations such as cropping and scaling, which are useful concepts when checking whether an editor’s output preserves the intended composition (FFmpeg filters documentation).
If your workflow includes optional YouTube publishing, distinguish export from publishing. A reviewable file gives an editor a chance to approve the cut before it goes live; direct publishing may save a handoff but should not remove an approval step your team requires.
Where automated clipping breaks down
Context can disappear at the cut. A clip may begin with “That’s the problem” and omit the point being discussed. It may end before a qualification, correction, or punchline. This is especially consequential in advice, news, legal, medical, and client communications: a technically accurate sentence can still mislead when isolated.
Audio and video can disagree. A transcript may identify the speaker while a center crop shows the wrong person. Multiple speakers, screen shares, picture-in-picture layouts, and gameplay overlays all complicate reframing. Caption placement can also obscure the visual detail that explains the moment.
Use a compact release checklist rather than relying on an automated score:
- Meaning: Does the clip preserve the needed setup and qualification?
- Transcript: Are names, numbers, technical terms, and negations correct?
- Frame: Are the active speaker and any essential on-screen details visible?
- Presentation: Are captions readable and clear of faces, controls, or important graphics?
- Rights and approval: Is the footage cleared for this use, and has the required owner approved it?
For regulated or sensitive material, treat the checklist as an editorial control, not a compliance certification. A tool’s processing location does not decide whether a proposed clip is authorized for publication, whether retention rules are met, or whether a reviewer has approved it.
Test difficult footage deliberately. Include overlapping speech, a guest name, a quiet speaker, a screen share, and a moment where a key event sits near the edge of the frame. These cases reveal different weaknesses; a single clean demo clip will not tell you whether the workflow suits a real archive.
Choose a local or cloud workflow, and test the Windows machine
Local and cloud processing make different trade-offs. In a local workflow, footage is analyzed on the computer rather than uploaded to a processing service. That can suit agencies, businesses, or professional teams that need to limit file transfers. It does not, by itself, establish encryption, retention behavior, access controls, or legal compliance. Confirm how projects, logs, exports, and optional publishing are handled before bringing sensitive recordings into any tool. ClipForge is a Windows desktop clipper that analyzes footage locally, with automatic captions, reframing, batch processing, and optional YouTube publishing without uploading video files to the cloud.
Cloud processing shifts the constraint. It can move analysis away from a user’s PC, but requires a team to evaluate upload permissions, connectivity, storage, and the service’s data practices. A local workflow avoids the upload step for source video, but depends more directly on the Windows computer’s available resources and on how the application handles temporary files. For a detailed overview of the local approach, see local AI video editing.
| Decision factor | Local processing | Cloud processing |
|---|---|---|
| Source-file movement | Video can remain on the workstation during analysis. | Video generally needs to be transferred to the service for remote analysis. |
| Hardware dependence | Processing capacity depends on the Windows PC and application support. | More processing runs remotely, while upload speed and connection reliability matter. |
| Governance questions | Check local storage, temporary files, backups, and who can access the machine. | Check transfer, storage, retention, access, and deletion terms with the provider. |
| Batch workflow | Test whether the machine can handle your chosen batch size without blocking other work. | Test upload time, queue behavior, and how results return to the editing team. |
When assessing Windows hardware, do not choose by a processor or GPU label alone. Ask the vendor for supported operating-system and hardware requirements, then test with representative footage on the actual machine or a comparable system. Microsoft’s DirectML documentation describes a Windows API for machine-learning workloads on compatible DirectX 12 hardware; it does not mean every application uses DirectML or that a compatible GPU guarantees a particular editing speed (Microsoft DirectML documentation).
- Use footage with the resolution, duration, audio quality, and number of speakers your team actually receives.
- Run a small batch while the computer is doing ordinary work; note whether analysis, playback, and editing remain practical.
- Check available disk space and where source files, project files, and exports are stored.
- Repeat the test on any older or lower-spec machine that staff will use, rather than assuming results transfer across PCs.
Make the decision with a pilot, not a feature list. Choose a representative set of recordings, define who reviews clips, and compare total hands-on effort and rejected suggestions across the same material. For podcast and creator workflows that need a Windows desktop process without source-video uploads, ClipForge offers local analysis, captions, reframing, batch processing, and optional YouTube publishing.
Authored with NotFair SEO